

Key Takeaways
- Sediment buildup is the leading cause of premature water heater failure and can be addressed with an annual flush.
- The anode rod is a sacrificial component that protects your tank from corrosion - it should be inspected every two to three years.
- Testing the temperature and pressure relief valve annually is a simple safety check that most homeowners skip.
- Setting the thermostat to 120°F reduces energy use and slows mineral buildup without sacrificing hot water performance.
- Most tank water heaters last 8-12 years; consistent maintenance can push that toward the higher end of the range.
What you will need
Why Water Heater Maintenance Gets Overlooked - and Why That's Costly
The water heater is one of the hardest-working appliances in most homes, delivering dozens of gallons of hot water every day with zero visible effort. That invisibility is exactly why it's neglected. Most homeowners only notice their water heater when there's a cold shower, a puddle on the floor, or a repair bill.
Sediment - primarily calcium and magnesium minerals - gradually settles on the bottom of the tank as water is heated. Over time, this layer insulates the burner or heating element from the water, forcing the unit to work harder, consume more energy, and eventually crack or fail prematurely. Annual maintenance interrupts that cycle. As part of a broader seasonal home maintenance routine, a water heater checkup belongs on every homeowner's annual calendar.
If you're weighing whether a tank-style unit is even right for your household long-term, the maintenance differences between tankless and traditional water heaters are worth understanding before your next replacement decision.
Turn Off Power Before Any Inspection
Before touching any component on your water heater, switch off the breaker (electric) or turn the gas valve to the pilot setting (gas). Working on a live unit risks serious burns or electrical shock. If you are ever uncertain about a gas connection, stop and call a licensed plumber or gas technician.
Tools and Preparation
Before starting, gather what you need and confirm you know the location of your breaker panel and cold water shutoff. This task requires no special plumbing knowledge, but preparation prevents having to stop mid-task.
Garden hose
Used to direct flushed sediment and water away from the unit safely during the tank drain.
Flat-head and Phillips screwdrivers
Needed to remove the access panel to inspect the thermostat and anode rod area on some models.
1-1/16" socket wrench
Required to loosen and remove the anode rod, which is typically torqued firmly into the tank.
Teflon (PTFE) thread tape
Applied to the anode rod threads when reinstalling to ensure a watertight seal.
Bucket
Catches initial drainage water and sediment during flushing when a full hose run is not convenient.
Work gloves and safety glasses
Protects hands and eyes from hot water, sediment, and corrosion debris during maintenance tasks.
What you will need
This maintenance routine applies specifically to storage tank water heaters - the most common type in U.S. homes. If you have a tankless (on-demand) unit, the procedure differs significantly; descaling and flow-sensor checks are the primary tasks for those systems.
Step-by-Step Maintenance Instructions
Complete all six steps in order. Most homeowners can finish the full routine in 30-60 minutes. Annual flushing and thermostat checks are minimum baseline tasks; anode rod inspection can be done every two to three years.
Shut down the power and cold water supply
For electric heaters, flip the dedicated breaker in your electrical panel. For gas units, rotate the gas valve to the Pilot position - do not turn it fully off, as relighting a pilot can be involved. Next, close the cold water inlet valve at the top of the unit. Allow the water in the tank to cool for at least one hour before draining to avoid scalding.
Test the temperature and pressure relief valve
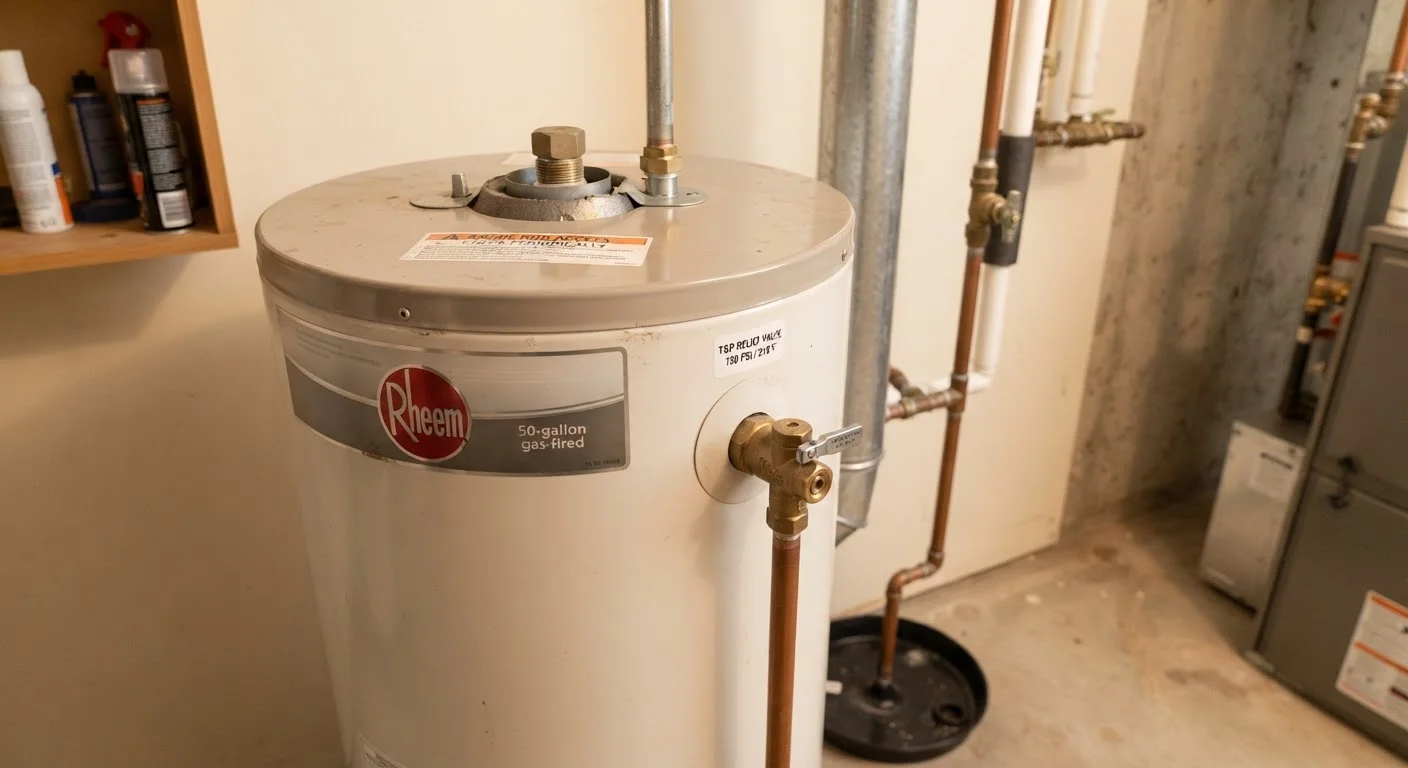
Locate the T&P relief valve - it's typically on the side or top of the tank, connected to a discharge pipe that points downward. Place a bucket under the discharge pipe, then lift the valve's lever briefly (1-2 seconds) and release it. You should hear a rush of water or steam, and the valve should snap shut cleanly. If it drips continuously afterward, the valve should be replaced by a licensed plumber.
Flush sediment from the tank
Attach a garden hose to the drain valve at the base of the tank and run the other end to a floor drain, utility sink, or outdoors. Open a hot water tap inside the house to allow air into the system and prevent a vacuum. Then open the drain valve fully. Allow the tank to drain until the water runs clear - sediment appears as sandy or gritty particles. Once clear, close the drain valve, remove the hose, and open the cold water supply to refill the tank before restoring power or gas.
Inspect and replace the anode rod if needed
The anode rod (usually magnesium or aluminum) corrodes intentionally to protect the steel tank lining. Locate the rod - it's typically threaded into the top of the tank or under a plastic cap on the hot water outlet. Use a 1-1/16" socket wrench to loosen it. Inspect the rod: if less than ½ inch of core wire remains, or it's heavily coated in calcium, replace it. Wrap threads in Teflon tape and torque the new rod firmly into place.
Check and adjust the thermostat setting
The U.S. Department of Energy and most plumbing professionals recommend setting your water heater thermostat to 120°F. This temperature is sufficient for household use, reduces energy consumption, and slows mineral scaling inside the tank. On electric units, you may need to remove an access panel to reach the thermostat dial. On gas units, the dial is usually visible on the front of the gas valve. Use a thermometer at a hot tap to verify the actual output temperature after adjustment.
Inspect for leaks and corrosion, then restore service
Once the tank has refilled completely (water will flow steadily from the open hot tap without air sputtering), restore power or relight the pilot according to your unit's instructions. Inspect all connections - the drain valve, inlet and outlet fittings, and T&P discharge pipe - for drips or mineral crust. Wipe fittings dry first so any new moisture is easy to spot over the next 24 hours. Note your findings and date in a maintenance record.
Do Not Ignore a Faulty Relief Valve
If your temperature and pressure (T&P) relief valve leaks continuously after testing, or if you notice corrosion around it, do not simply cap it or ignore it. A malfunctioning T&P valve is a safety hazard. Have a licensed plumber replace it promptly - this is not a repair to defer.
Log Every Maintenance Task
Recording the date, findings, and any parts replaced after each maintenance visit pays dividends over time. A home maintenance log helps you track service intervals, supports warranty claims, and adds credibility if you ever sell your home.
How to Know When Maintenance Isn't Enough
Routine maintenance extends lifespan, but it cannot reverse advanced deterioration. Watch for these signs that signal it's time to involve a licensed plumber rather than continue DIY upkeep:
- Rust-colored hot water despite a relatively new anode rod - this often means the tank lining is compromised.
- Persistent rumbling or popping sounds during heating, indicating severe sediment buildup that flushing alone won't resolve.
- Visible corrosion or pooling water at the base of the unit - tank failures typically cannot be repaired and require full replacement.
- Inconsistent hot water output on a unit more than 10 years old, particularly combined with rising energy bills.
Proactive upkeep like this falls squarely in the category of low-cost tasks that prevent high-cost repairs - a principle that extends across nearly every system in your home. Similarly, pairing water heater care with broader energy efficiency work - like weatherizing your home seasonally - compounds the long-term savings.